So, you're putting in a new shed – that's fantastic! But before you even start dreaming about walls or a roof, you absolutely have to get the foundation right. I've seen too many folks in places like Willow Glen or Almaden Valley try to skimp here, and it always, always comes back to bite them. A good foundation isn't just about keeping your shed from sinking into the ground; it's about protecting everything inside from moisture, pests, and even those occasional San Jose earthquakes. Let's dig into what you need to know.
Why a Solid Foundation Matters (Seriously, More Than You'd Think)
Look, your shed's foundation is, quite literally, the base of the whole thing. If it's not level, stable, and built properly for our local conditions, you're in for a world of hurt. Doors won't close quite right, windows will stick, and eventually, the whole structure could twist and rack. Here in San Jose, we deal with all sorts of soil types, from heavy clay to sandy loam, and we certainly get our share of winter rain. You need a foundation that can stand up to all that, keep critters out, and prevent wood rot.
A proper foundation lifts your shed off the ground, letting air move freely underneath. That's super important for stopping moisture from building up, which otherwise leads to mold, mildew, and wood decay. It also makes it a lot tougher for termites and other pests to make themselves at home in your shed's floor joists. Trust me, you really don't want to deal with that down the line.
Picking Your Foundation Type: What's the Best Fit for You?
There are a few common types of foundations out there, and each has its own upsides and downsides. What you pick usually comes down to your shed's size, your budget, and how much work you're willing to do yourself.
- Skid Foundation: This is basically just pressure-treated runners (we call them skids) laid directly on the ground or on a gravel bed. It's simple, pretty cheap, and you can even move the shed later if you need to. For smaller sheds, maybe an 8x10 or 10x12, this can totally work. You'll definitely want to put down a good, thick layer of compacted gravel and a weed barrier first, though.
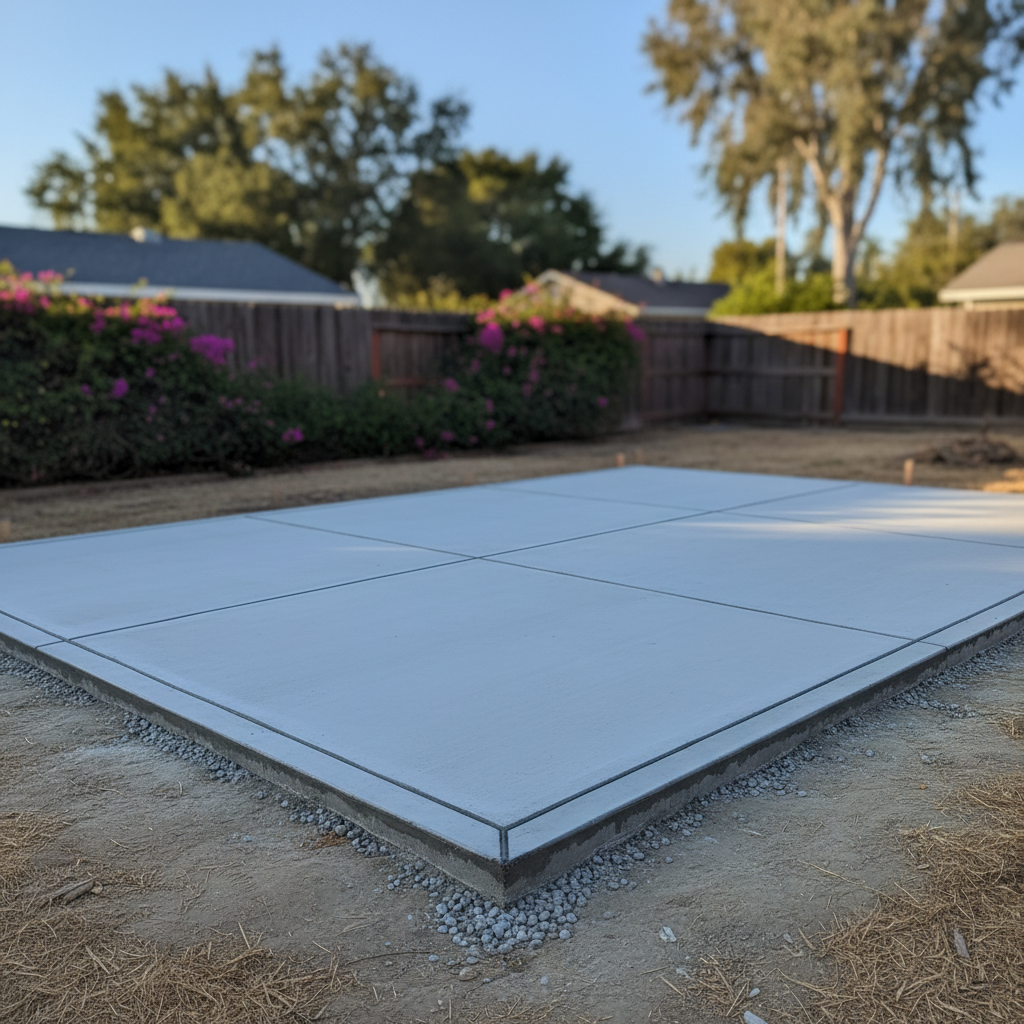
- Concrete Slab: This is a solid concrete pad, poured right onto the ground. It's incredibly tough, gives you a super stable base, and offers excellent protection against moisture and pests. It's also the most permanent choice. For bigger sheds, workshops, or if you're storing heavy equipment, a slab is often the way to go.
- Pier and Beam (or Post and Beam): This involves concrete piers (or posts) dug into the ground below the frost line, with beams running between them to hold up the shed's floor joists. This setup provides fantastic ventilation underneath and works great for uneven ground. It's a bit more complicated to build than a slab, no doubt.
For most backyard sheds here in San Jose, a skid foundation on a gravel base or a concrete slab are the most popular options. If you're building something much bigger or on a sloped yard, pier and beam might be worth looking into.
Before You Even Start: The Absolutely Critical Prep Work
This is where most DIYers either shine or, well, fall flat. Don't, under any circumstances, skip these steps:
- Check Local Codes: First things first, give the City of San Jose Planning Department a call. Depending on how big and tall your shed is, you might need a permit. Even if you don't, there could be rules about how close it can be to your property lines. You certainly don't want to build something only to find out you have to move it later.
- Pick Your Spot and Level It: Find the best place in your yard. Think about drainage – you really don't want water pooling around your shed. Mark out exactly where your shed will sit. Then comes the big one: leveling the ground. This isn't optional. If your ground isn't level, your foundation won't be level, and your shed will be a mess. You can use stakes, string, and a line level, or even a laser level for larger areas. Dig out any high spots and fill in low spots with compacted gravel or soil.
- Drainage and Ground Prep: Once it's level, you'll want to lay down some good weed barrier fabric. This stops weeds from poking up through your foundation. On top of that, spread a layer of crushed gravel (usually 4-6 inches deep) and compact it thoroughly. This provides excellent drainage and a super stable base for whatever foundation type you choose. For concrete slabs, you'll also need to lay down a vapor barrier (that's thick plastic sheeting) before you pour.
DIY vs. Calling a Pro: Knowing When to Get Help
A lot of the prep work – clearing the site, leveling, laying gravel – that's definitely something most handy homeowners can tackle. If you're going with a simple skid foundation on a gravel base, you can probably handle the whole thing yourself. Just make sure those skids are level and properly supported.
However, when it comes to pouring a concrete slab or building a pier and beam foundation, that's where I often tell folks to seriously consider bringing in a professional. Concrete work is tricky, you know? Getting it perfectly level, sloped correctly for drainage (if it needs to be), and making sure it cures right takes real experience. A poorly poured slab can crack, settle unevenly, and cause headaches for years. Plus, it's a lot of heavy, back-breaking work.
For pier and beam, digging footings to the right depth, making sure they're perfectly plumb, and properly attaching the beams requires a solid understanding of construction principles. If you're not confident with these tasks, it's absolutely worth getting a quote from a local concrete contractor or a general builder. We at Custom Sheds of San Jose can also help advise on foundation requirements for our custom builds, or even handle the foundation work for you.
After the Foundation: What Happens Next?
Once your foundation is in place and cured (if it's concrete, of course), you're ready to start building or assembling your shed. But don't forget to keep that foundation maintained. Keep the area around your shed clear of debris and plants to ensure good airflow and prevent moisture buildup. Check for any signs of settling or cracking, especially after heavy rains.
A solid foundation is an investment, not an expense. Get it right, and your shed will stand strong for decades, protecting your tools, toys, or whatever else you're storing inside. Cut corners, and you'll be dealing with problems sooner than you think. It's really that simple.