Alright, let's talk about shed foundations. Look, this isn't the most exciting part of getting a new shed, but it's probably the most important. Skimp here, and you're just asking for trouble down the road – warped doors, cracked walls, maybe even a shed that shifts with our San Jose clay soil. Nobody wants that. So, what exactly do you need to know before you even think about putting up walls?
Before You Start: Planning Your Shed Foundation
First things first, figure out what kind of shed you're building and what you're planning to put inside it. A small, lightweight storage shed for garden tools is a completely different animal than a heavy-duty workshop or a backyard office. The heavier the shed and its contents, the tougher your foundation needs to be.
Next, check your local San Jose building codes. Seriously, I can't emphasize this enough. Depending on the size of your shed, you might need permits for the structure itself, and sometimes even for the foundation work. Don't just assume. A quick call to the city's planning department can save you a huge headache later. You also need to know about setbacks from property lines and other structures. Trust me, nobody wants to tear down a freshly built shed because it's too close to the fence, right?
Then, take a good look at your site. Is it flat? Is it sloped? What's the drainage like? You absolutely do not want water pooling under your shed. If you've got a significant slope or really poor drainage, that's a big red flag right away, suggesting this might be a job for someone with more experience.
Common Shed Foundation Types & What They Entail
You'll find a few main types of foundations for sheds out there. Each has its good points and bad points, and some are definitely more "do-it-yourself" friendly than others.
- Gravel Pad: This is probably the most common choice and often the easiest for a homeowner to tackle. You essentially dig out a shallow area, lay down a weed barrier, and then fill it with compacted gravel. It gives you good drainage and a relatively level surface. It's great for smaller, lighter sheds.
- Concrete Pavers or Blocks: This is similar to a gravel pad, but instead of just gravel, you place concrete blocks or pavers on top of a prepared, level gravel base. This creates a more solid, individual footing for your shed's skids or floor joists. Still pretty DIY-friendly for smaller sheds.
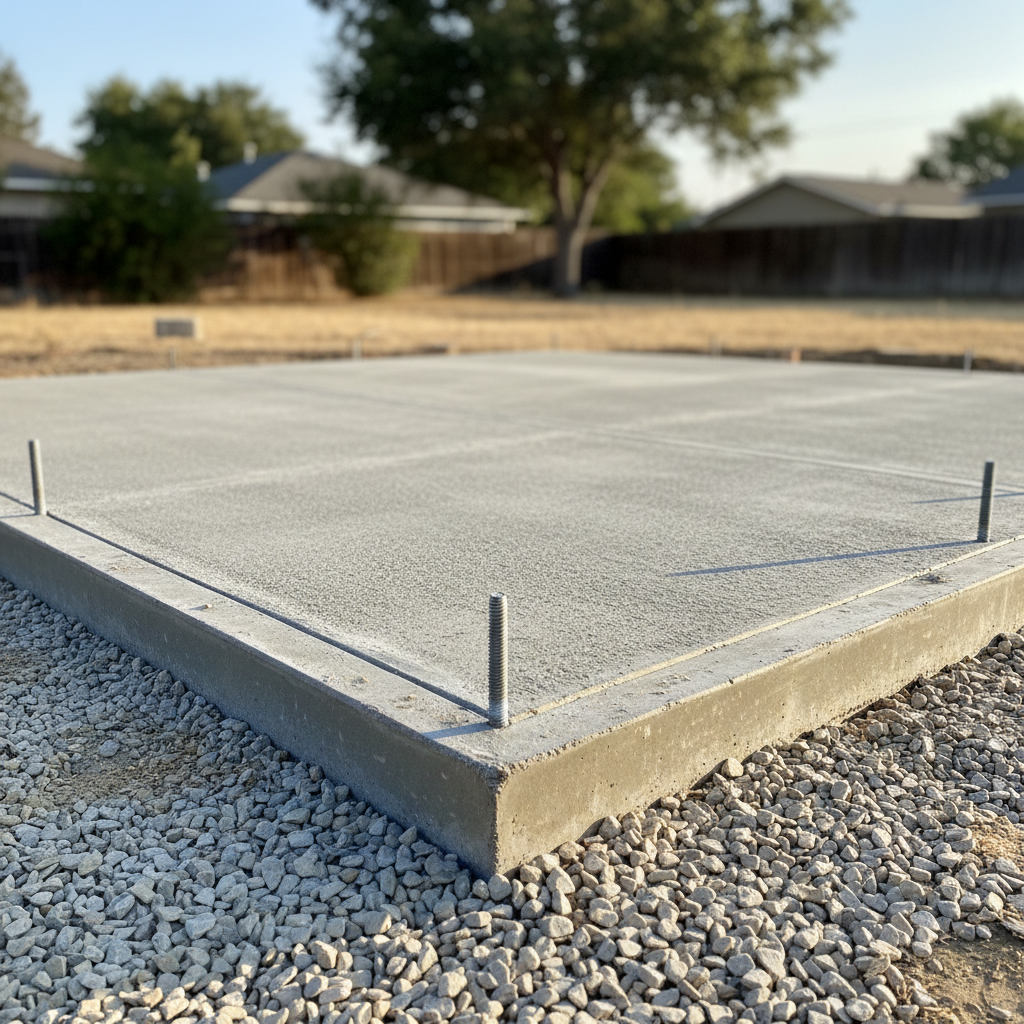
- Concrete Slab: Now we're getting serious. A concrete slab is a permanent, solid foundation. It's excellent for larger, heavier sheds, workshops, or any structure where you want a perfectly level, strong, and pest-resistant base. This involves excavation, forming, rebar, and pouring concrete.
- Post & Beam or Pier & Beam: This type lifts the shed off the ground, which is fantastic for drainage and ventilation, especially on sloped sites. It means digging holes, setting concrete piers or posts, and then building a wooden beam structure on top.
When to DIY Your Shed Foundation
You can realistically handle a gravel pad or a paver/block foundation yourself if:
- Your shed is on the smaller side (let's say 8x10 or smaller).
- Your site is fairly level, with good drainage.
- You're okay with some physical labor – digging, leveling, compacting.
- You've got the right tools: shovels, rakes, a level, a tamper, and maybe a wheelbarrow.
- You've checked your local codes and don't need complex permits.
These types of foundations are forgiving enough that if you're a little off, it's not the end of the world. Just make sure everything is level and well-compacted. That's the real trick.
When to Call a Pro for Your Shed Foundation
Here's when you should seriously think about bringing in someone like us at Custom Sheds of San Jose, or another qualified contractor:
- Large or Heavy Sheds: If you're building anything over 10x12, or if it's going to house heavy equipment, a concrete slab or a sturdy pier foundation is probably your best bet. These need precision, proper rebar placement, and experience with concrete.
- Sloped or Uneven Sites: Trying to level a significantly sloped site for a foundation is much harder than it looks. A pro can figure out the best approach, whether that means extensive grading, retaining walls, or a custom pier system.
- Poor Drainage or Tricky Soil: Some areas in San Jose, especially around the foothills, can have tricky soil conditions or drainage issues. You might need specialized drainage solutions or deeper footings to prevent settling or erosion. A pro will know how to handle this.
- Permit Requirements: If your project needs complex permits or engineering drawings for the foundation, it's usually smarter to let a professional handle it. They know the ropes and can ensure everything is up to code.
- Time & Effort: Let's be honest, foundation work is hard. If you don't have the time, the physical ability, or the desire to spend a weekend (or more!) digging and hauling, hiring it out is a smart move.
After the Foundation: What's Next?
Once your foundation is in, give it time to settle or cure, especially if it's concrete. You really don't want to rush things. For concrete, that typically means several days, sometimes even a week or more, before you put significant weight on it. For gravel or pavers, you can usually start building right away, as long as it's solid and level.
Keep an eye on it over the first few weeks and months. Look for any signs of settling, shifting, or drainage issues. If you built it yourself, you'll learn a lot. If you hired a pro, they should stand by their work. A good foundation means your shed will last, stay square, and protect whatever you put inside it for years to come. It's the unsung hero of your backyard storage solution, so don't cut corners here.